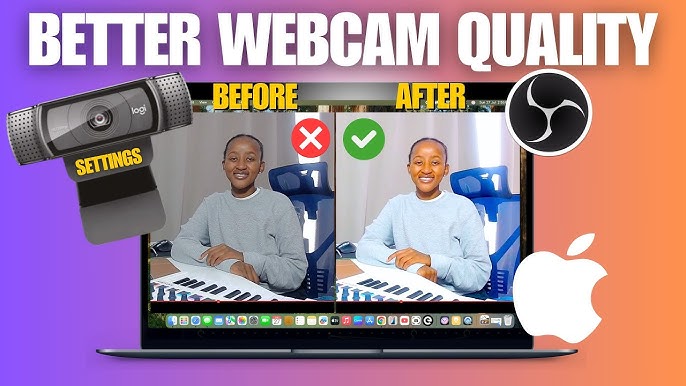
Setting up your Logitech webcam on a Mac doesn’t have to be confusing or time-consuming. Whether you want to improve your video calls, start streaming, or record high-quality videos, getting your webcam up and running smoothly is key.
In this guide, you’ll find simple, step-by-step instructions that anyone can follow—even if you’re not tech-savvy. By the end, you’ll be ready to enjoy crisp, clear video with minimal hassle. Keep reading to unlock the full potential of your Logitech webcam on your Mac.

Credit: www.youtube.com
Check Webcam Compatibility
Before setting up your Logitech webcam on a Mac, check if it works with your system. Compatibility ensures the webcam functions well without issues.
Not all Logitech webcams support macOS. Knowing your model’s compatibility saves time and effort during setup.
Check Macos Version Requirements
Each Logitech webcam may require a specific macOS version. Verify your Mac’s operating system matches the webcam’s needs.
You can find macOS version information in the Apple menu under “About This Mac.”
- Logitech webcams usually support macOS 10.10 or later
- Older webcams may not work with new macOS versions
- Check Logitech’s website for exact version support
Identify Your Webcam Model
Know the exact model number of your Logitech webcam. This helps find the right drivers and support information.
Look at the box or the webcam itself for the model number. It usually starts with C or BRIO.
- Logitech C920
- Logitech C270
- Logitech BRIO 4K
Verify Driver Availability
Some Logitech webcams need special drivers for Mac. Check if drivers exist for your webcam model.
Drivers improve webcam performance and add extra features. Without them, your webcam may only offer basic functions.
- Visit Logitech’s official support website
- Search by webcam model for Mac drivers
- Download and install drivers if available
Test Webcam With Mac Apps
After checking compatibility, test your webcam on Mac apps like FaceTime or Photo Booth. This confirms if it works correctly.
If your webcam shows video in these apps, it is compatible and ready to use.
- Open FaceTime and select your webcam
- Use Photo Booth to check video quality
- Try other video apps like Zoom for testing

Credit: www.youtube.com
Download Logitech Software
To set up your Logitech webcam on a Mac, you need the right software. This software helps your webcam work smoothly and gives you extra features.
Downloading software from the official source is important. It ensures you get the latest updates and avoid security risks.
Locate Official Logitech Website
Start by visiting the official Logitech website. This is the safest place to find the correct software for your webcam.
- Open your web browser on your Mac.
- Type www.logitech.comin the address bar.
- Press Enter to load the site.
- Look for the Support or Downloads section.
- Search for your webcam model.
Choose Correct Software Version
Select the software version that matches your Mac’s operating system. Installing the wrong version might cause problems.
| Mac OS Version | Recommended Software |
|---|---|
| macOS Ventura (13) | Logi Tune Latest Version |
| macOS Monterey (12) | Logi Tune Latest Version |
| macOS Big Sur (11) | Logi Tune Version 1.35 or later |
| Older macOS Versions | Check Logitech Support Page |
Connect Webcam To Mac
Setting up your Logitech webcam on a Mac is simple. You need to connect it properly and make sure the Mac recognizes it.
This guide covers how to use USB ports and verify the device recognition for smooth setup.
Use Usb Ports
Logitech webcams usually connect via USB. Use a free USB port on your Mac to plug in the webcam.
- Locate an available USB port on your Mac.
- Plug the webcam’s USB cable firmly into the port.
- Avoid using USB hubs as they may cause connection issues.
- Wait a few seconds for the Mac to detect the device.
Verify Device Recognition
After connecting, check if your Mac recognizes the Logitech webcam.
| Check Method | How To |
| System Information | Click Apple menu > About This Mac > System Report > USB. Find your webcam in the list. |
| Camera App | Open the Camera app or any video app. Choose your Logitech webcam as the video source. |
| Privacy Settings | Go to System Preferences > Security & Privacy > Camera. Make sure apps have permission to use the webcam. |
Configure Webcam Settings
After connecting your Logitech webcam to your Mac, it is important to adjust the settings. Proper configuration helps you get clear and smooth video.
In this section, we explain how to set video resolution, frame rate, and camera controls for the best experience.
Adjust Video Resolution
Video resolution affects how sharp your video looks. Higher resolution means clearer images but needs more power.
To change resolution on Mac, open your video app and check camera settings. Choose a resolution that fits your needs.
- 1080p for full HD quality
- 720p for faster streaming
- 480p for lower data use
Set Frame Rate
Frame rate controls how smooth the video looks. More frames per second give smoother motion.
Most Logitech webcams allow setting frame rates between 15 and 60 fps. Pick a rate that suits your internet speed and device.
- 30 fps is good for most video calls
- 60 fps is better for fast movement
- Lower fps saves bandwidth
Customize Camera Controls
Camera controls let you change brightness, contrast, and zoom. Adjust these to improve video quality.
Use Logitech’s software or Mac apps that support camera controls. Change settings until the video looks right.
- Increase brightness in dark rooms
- Adjust contrast for clear details
- Use zoom to focus on yourself
Test Webcam Functionality
After setting up your Logitech webcam on a Mac, test its functionality. Checking the camera ensures clear video during calls or recordings.
Use simple tools available on your Mac to confirm that the webcam works correctly before any important use.
Use Built-in Camera App
Open the built-in Camera app to see your webcam in action. This app shows a live preview from the camera.
- Click the Spotlight icon and type “Photo Booth”.
- Open the Photo Booth app to view the webcam feed.
- Check the image clarity and lighting in the preview.
- Take a test photo or record a short video.
- Review the photo or video to confirm the webcam works well.
Try Video Conferencing Tools
Use popular video conferencing tools to test your Logitech webcam in real situations. This helps check video and audio quality together.
| Video Tool | How to Test |
| Zoom | Start a new meeting and check video settings |
| Google Meet | Join a test meeting and verify webcam output |
| Microsoft Teams | Use device settings to preview the webcam |
| Skype | Open video call window to see camera feed |

Credit: device.report
Troubleshoot Common Issues
Setting up a Logitech webcam on a Mac can be easy. Sometimes, issues may occur that need troubleshooting.
This guide will help solve common problems with your Logitech webcam. Follow these steps to ensure smooth operation.
Update Macos
Keeping macOS updated is crucial for device compatibility. An outdated system can cause webcam issues.
Check for updates regularly to ensure all components work well together.
- Go to the Apple menu.
- Select “System Preferences.”
- Click on “Software Update.”
- Follow prompts to install updates.
Reinstall Logitech Drivers
Sometimes, drivers may become corrupted. Reinstalling drivers can fix webcam issues.
Ensure you download the correct drivers from the Logitech website.
- Open your web browser.
- Go to the Logitech support page.
- Find your webcam model.
- Download the latest drivers.
- Install the drivers following instructions.
Check Privacy Settings
Mac privacy settings can block webcam access. Adjust settings to allow webcam use.
Make sure applications can access your webcam as needed.
- Open “System Preferences.”
- Select “Security & Privacy.”
- Go to the “Privacy” tab.
- Click on “Camera.”
- Check the box next to the apps you want to allow.
Optimize Video Quality
Setting up your Logitech webcam on a Mac requires a few adjustments. These tweaks help you achieve the best video quality.
Follow these simple tips to ensure your video calls are clear and professional.
Lighting Tips
Good lighting is crucial for clear video. It helps reduce shadows and enhances your appearance.
- Use natural light from windows during the day.
- Position a lamp behind your webcam for consistent light.
- Avoid having bright lights behind you to prevent glare.
Background Setup
Your background should be tidy and non-distracting. This keeps the focus on you during calls.
Consider using a virtual background if your space is cluttered.
Positioning The Webcam
Proper webcam positioning ensures you are centered and visible. It also helps in maintaining eye contact with your audience.
| Position | Benefit |
| Eye Level | Natural Eye Contact |
| Centered | Balanced Composition |
| Stable Surface | Prevents Shaking |
Frequently Asked Questions
How Do I Install A Logitech Webcam On A Mac?
Connect your Logitech webcam to your Mac’s USB port. MacOS usually auto-detects and installs necessary drivers. Open any video app to test the webcam. For advanced settings, download Logitech’s Camera Settings software from their official site.
Why Isn’t My Logitech Webcam Working On Mac?
Check if your Mac recognizes the webcam in System Report under USB. Restart your Mac and reconnect the webcam. Ensure macOS permissions allow camera access in System Preferences > Security & Privacy > Camera. Update macOS and Logitech software to fix compatibility issues.
How To Adjust Logitech Webcam Settings On Mac?
Download Logitech Camera Settings software for Mac from the Logitech website. This app lets you control brightness, contrast, zoom, and focus. If unavailable, use your video calling app’s built-in camera controls. Always check for the latest software version for best features.
Can I Use Logitech Webcam Without Extra Software On Mac?
Yes, most Logitech webcams work plug-and-play with macOS. Basic functions like video capture and streaming work without extra drivers. However, for advanced controls and customization, installing Logitech’s software is recommended for optimal performance and features.
Conclusion
Setting up your Logitech webcam on a Mac is simple and quick. Follow the steps carefully for smooth installation. Your Mac will detect the webcam automatically in most cases. Adjust settings to improve video quality and sound. Test the webcam with different apps to ensure it works well.
Enjoy clear video calls and recordings with your Logitech webcam. Keep your software updated for the best experience. Troubleshoot gently if any issue appears. Now, your Mac is ready to use the webcam anytime. Easy, fast, and effective setup makes it hassle-free.


